[Spring] WebApplicationContext / ConnectionPool
※ Controller -----> Service -----> Dao
※ Service 패키지 생성
▶ @Service 어노테이션 설정 시 스프링의 관리 객체에 해당된다.
cf> @Controller, @RestController, @Service, @Repository, @Component가 붙어있으면 관리 객체에 해당된다.
※ DAO 패키지 생성
▶@Repository 어노테이션 설정 시 스프링의 관리 객체에 해당된다.
※ Spring이 관리하고 있는 객체를 가져오는 방법 (n가지)
@Autowired
private Exam04Service exam04Service;
1. @Autowired. => DI (Dependency Injection) 스프링이 관리 객체를 자동 주입시킨다.
WebApplicationContext(Spring에서 제공하는 IoC 컨테이너)안에 있는 bean들을 스캔해서
Exam04Service Type의 객체가 있는지 조사를하고, 만약 찾았다면 참조 번지를 exam04Service 필드에 넣어준다.
2. @Resources
※ WebApplicationContext
: Spring Web MVC에서 사용하는 IoC 컨테이너
: ContextLoaderListener와 DispatcherServlet에서 생성할 수 있음
: ContextLoaderListener가 생성한 WebApplicationContext에서는 공유 빈을 관리하고,
DispatcherServlet에서 생성한 WebApplicationContext에서는 개별 빈을 관리한다.
[IoC 관련 Annotation]
<context:component-scan base-package=“com.mycompany”/>
- base-package=“”: Annotation을 찾을 시작 패키지(하위 패키지 모두 검색)
- use-default-filters=“true”: 아래 Annotation을 찾아 관리 빈으로 자동 생성
- @Controller, @Service, @Repository, @Component
1. <context:include-filter> : 관리 빈 생성에 포함될 Annotation 지정
★ use-default-filters="false"
: 이 기능을 꺼버려야 내가 원하는 것만 관리 빈으로 포함할 수 있다.
[(실습) root-context.xml]

<!-- @Service, @Repository만을 찾아서 관리 객체로 등록 -->
<context:component-scan base-package="com.mycompany.webapp" use-default-filters="false">
	<context:include-filter type="annotation"
    		expression="org.springframework.stereotype.Service"/>
	<context:include-filter type="annotation"
    		expression="org.springframework.stereotype.Repository"/>
</context:component-scan>
2. <context:exclude-filter> : 관리 빈 생성에서 제외될 Annotation 지정
[(실습) servlet-context.xml]
<!-- @Controller, @RestController, @Component를 찾아서 관리 객체로 등록
@Service, @Repository는 관리 객체로 등록하지 않음(root에서 관리 객체로 관리함.)
-->
<context:component-scan base-package="com.mycompany.webapp">
<context:exclude-filter type="annotation"
expression="org.springframework.stereotype.Service"/>
<context:exclude-filter type="annotation"
expression="org.springframework.stereotype.Repository"/>
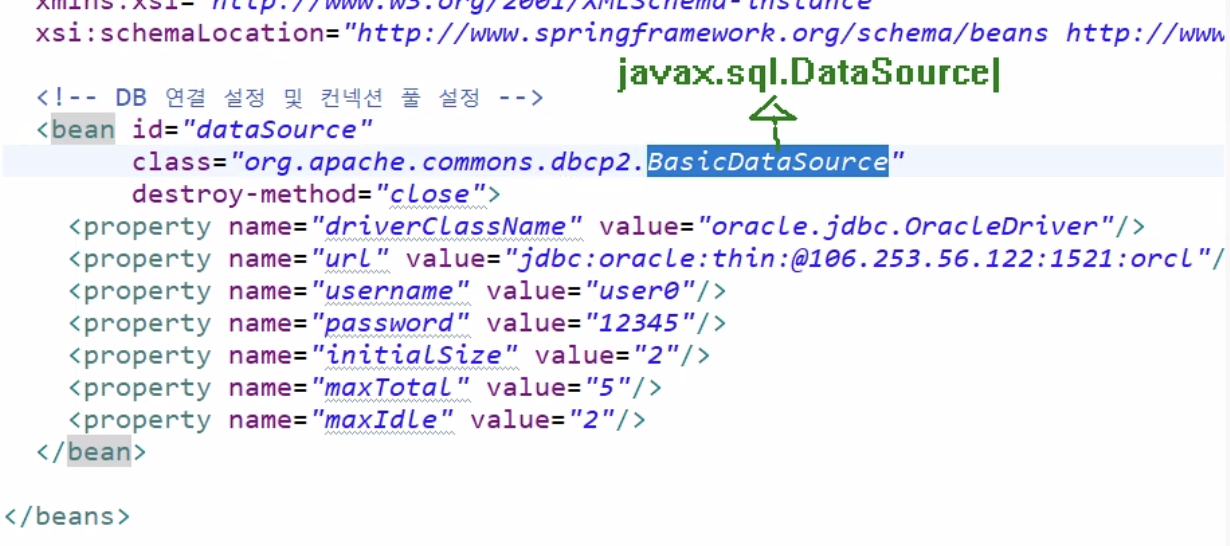
</context:component-scan>※ ConnectionPool
- DB는 루트에 공유빈으로 관리되어야 한다.

<bean id="dataSource" class="org.apache.commons.dbcp2.BasicDataSource"
		destroy-method="close">

	</bean>
1. org.apache.commons.dbcp2.BasicDataSource -> maven에서 다운


2. oracle.jdbc.OracleDriver -> Oracle 사이트에서 직접 다운로드 받아야 한다.


www.oracle.com/database/technologies/jdbc-upc-downloads.html
2-1) 프로젝트에 직접 lib 폴더에 넣기 - 매 프로젝트마다 새로 설치
2-2) maven에 직접 설치 - 한번만 하면됨 && pom.xml에 라이브러리 추가
=> 터미널에서 sh파일 실행시키기
[JDBC API 이용 방법 - Spring은 이렇게 작성 안함 ]
	@Autowired
	private DataSource dataSource;
	// BasicDataSource는 javax.sql.DataSource를 구현한 객체이기 때문에 주입할 수 있다.

	@RequestMapping("/content")
	public String content(Model model) {
		Connection conn = null;
		try {
			// 커넥션 풀에서 커넥션 객체를 대여해 오기
			conn = dataSource.getConnection();
			model.addAttribute("connStatus", "성공");

		} catch(Exception e) {
			e.printStackTrace();
			model.addAttribute("connStatus", "실패");
		} finally {
			try{
				// 커넥션 풀로 커넥션 객체를 반납하기
				conn.close();
			}catch(Exception e) {}
		}

		return "exam04/content";
	}
3. MyBatis 라이브러리 설정

